2/26/13

Some links

Single Lady Cookie-28
from Top with cinnamon


1. I just discovered this blog, and it's amazing! She is really talented. She makes great photo's, great recipes and she writes great.

2. I really love these shoes!

3. I don't really wear dresses, but if I would I'd buy all my dresses here!

4. I'm obsessed with s'mores, and this would be a really good idea for a dessert buffet!

5. I still have some candy canes left over from christmas, and I'm gonna turn them into these mousses, I think they'd be delicious!

6. This blog really is too beautiful! The photos, recipes, little videos! It's really beautiful.

7. How to make your own cotton candy. I never really thought of making that, but I really want to make it now!

8. These caramel brownie tarts seem really easy to make! If I don't have a lot of time but do have to make something, I'll try these!


Sweetened Condensed Milk Cookies

I had half a can of sweetenend condensed milk left, the other half I used for Martha Washington Candy that I made on George Washingtons Birthday, which was last friday. I don't like to waste things, so I looked up recipes which use sweetened condensed milk, and I ended up making 
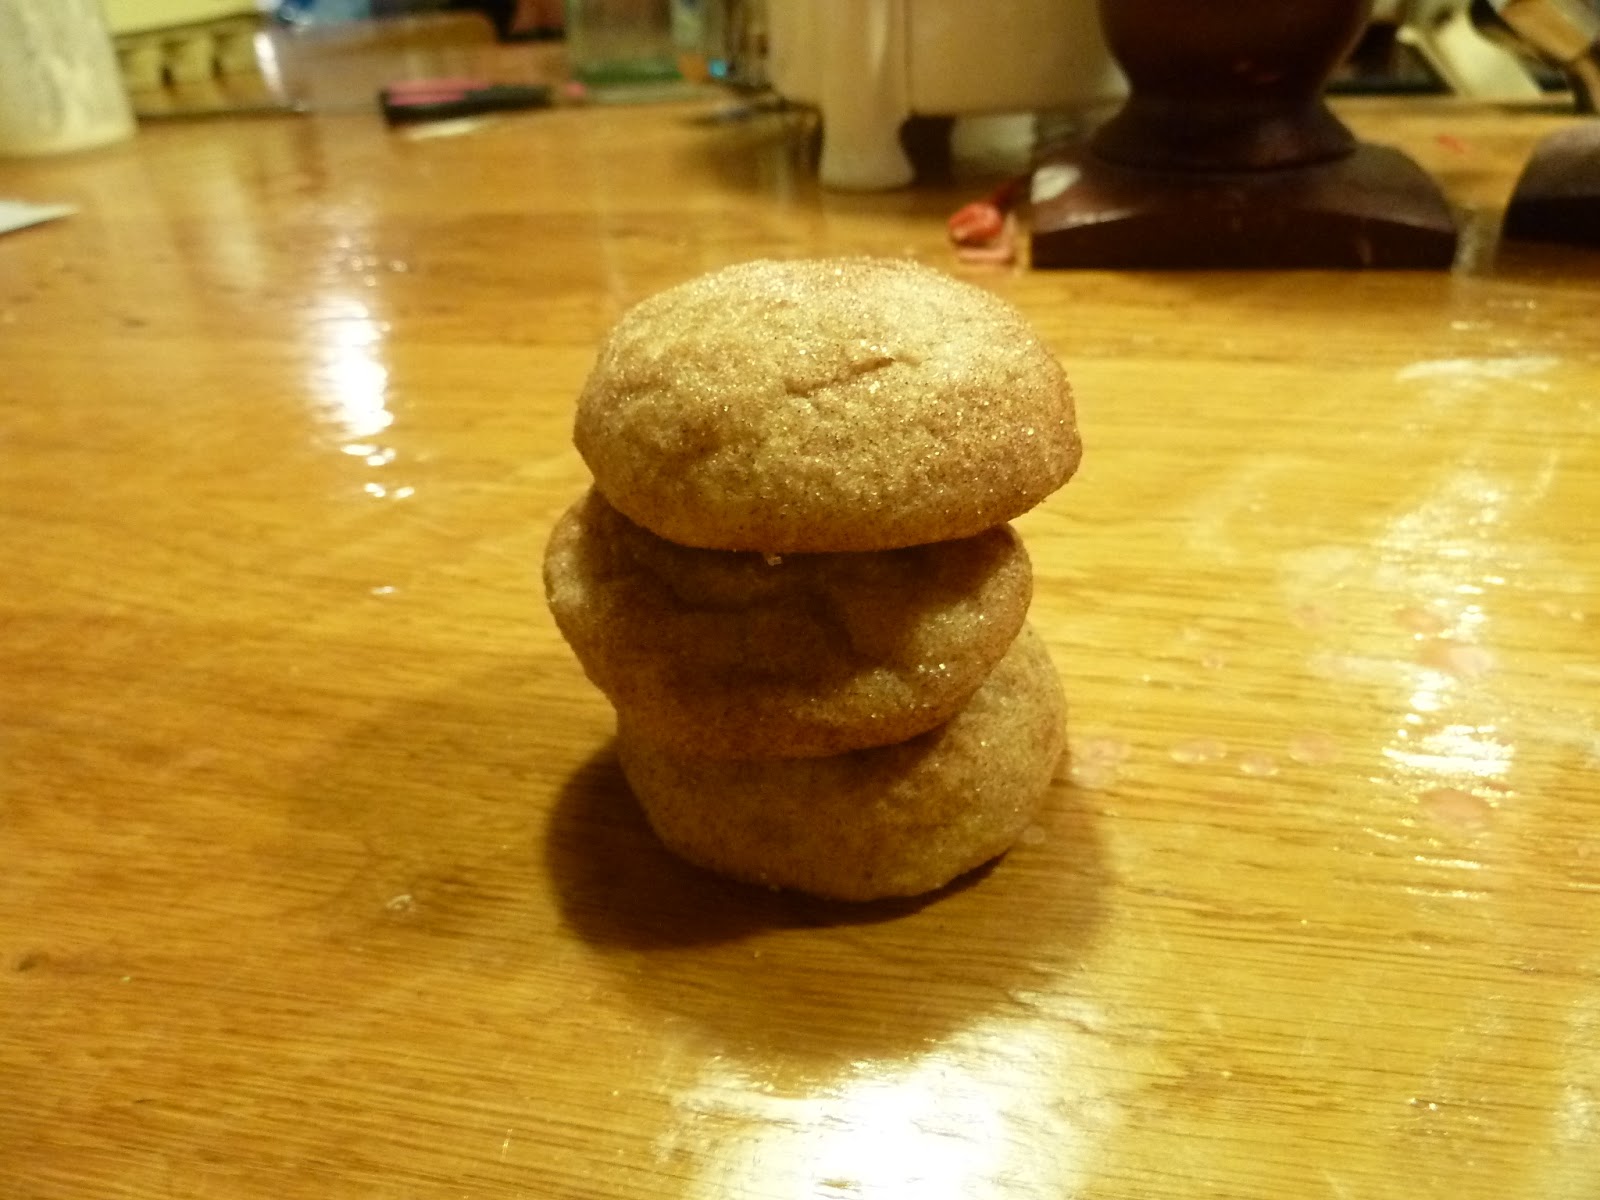
this recipe for sweetened condensed milk cookies. There are only 3 main ingredients, and then you can add in anything you want, such as chocolate, cranberries, cocoa, nuts, and more.


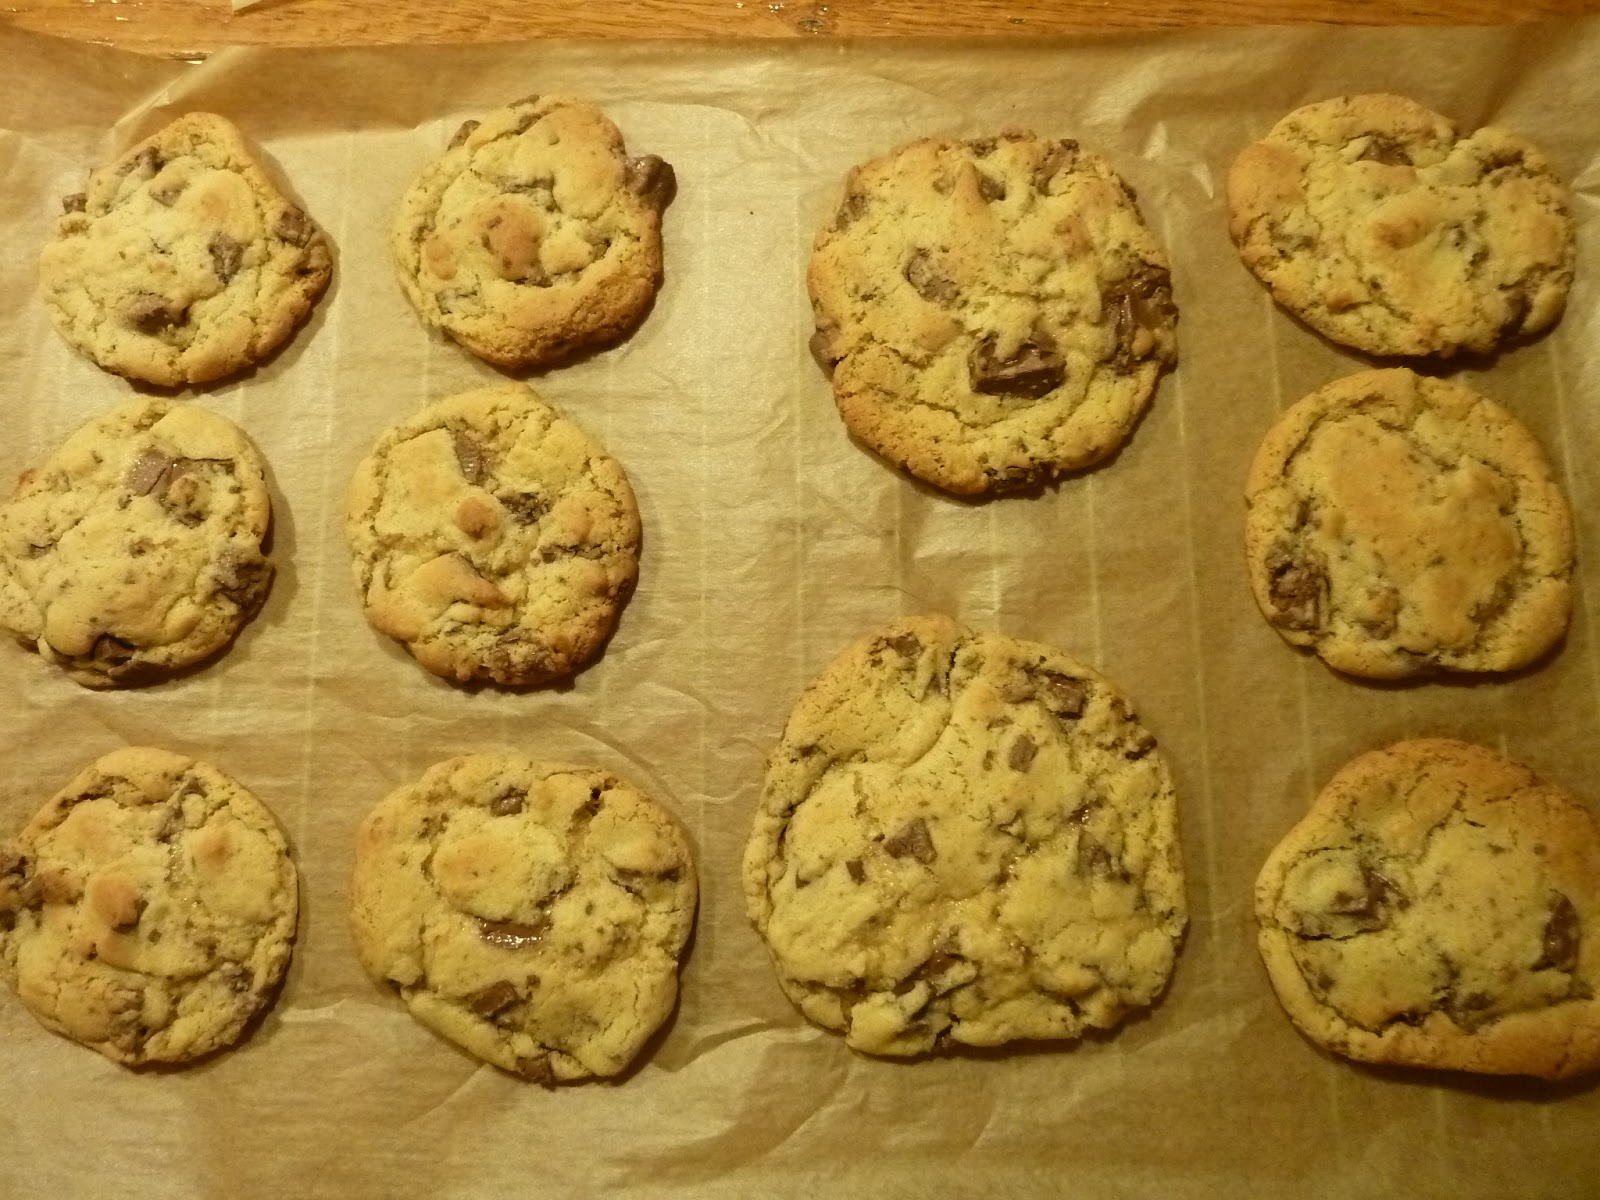
 made half of the original recipe, since I only had half a can left, and divided that in 3. I added chocolate chips to one part, cranberries and pistachios to another and I tried to make s'mores cookies by adding marshmallows and graham crackers to the third part.


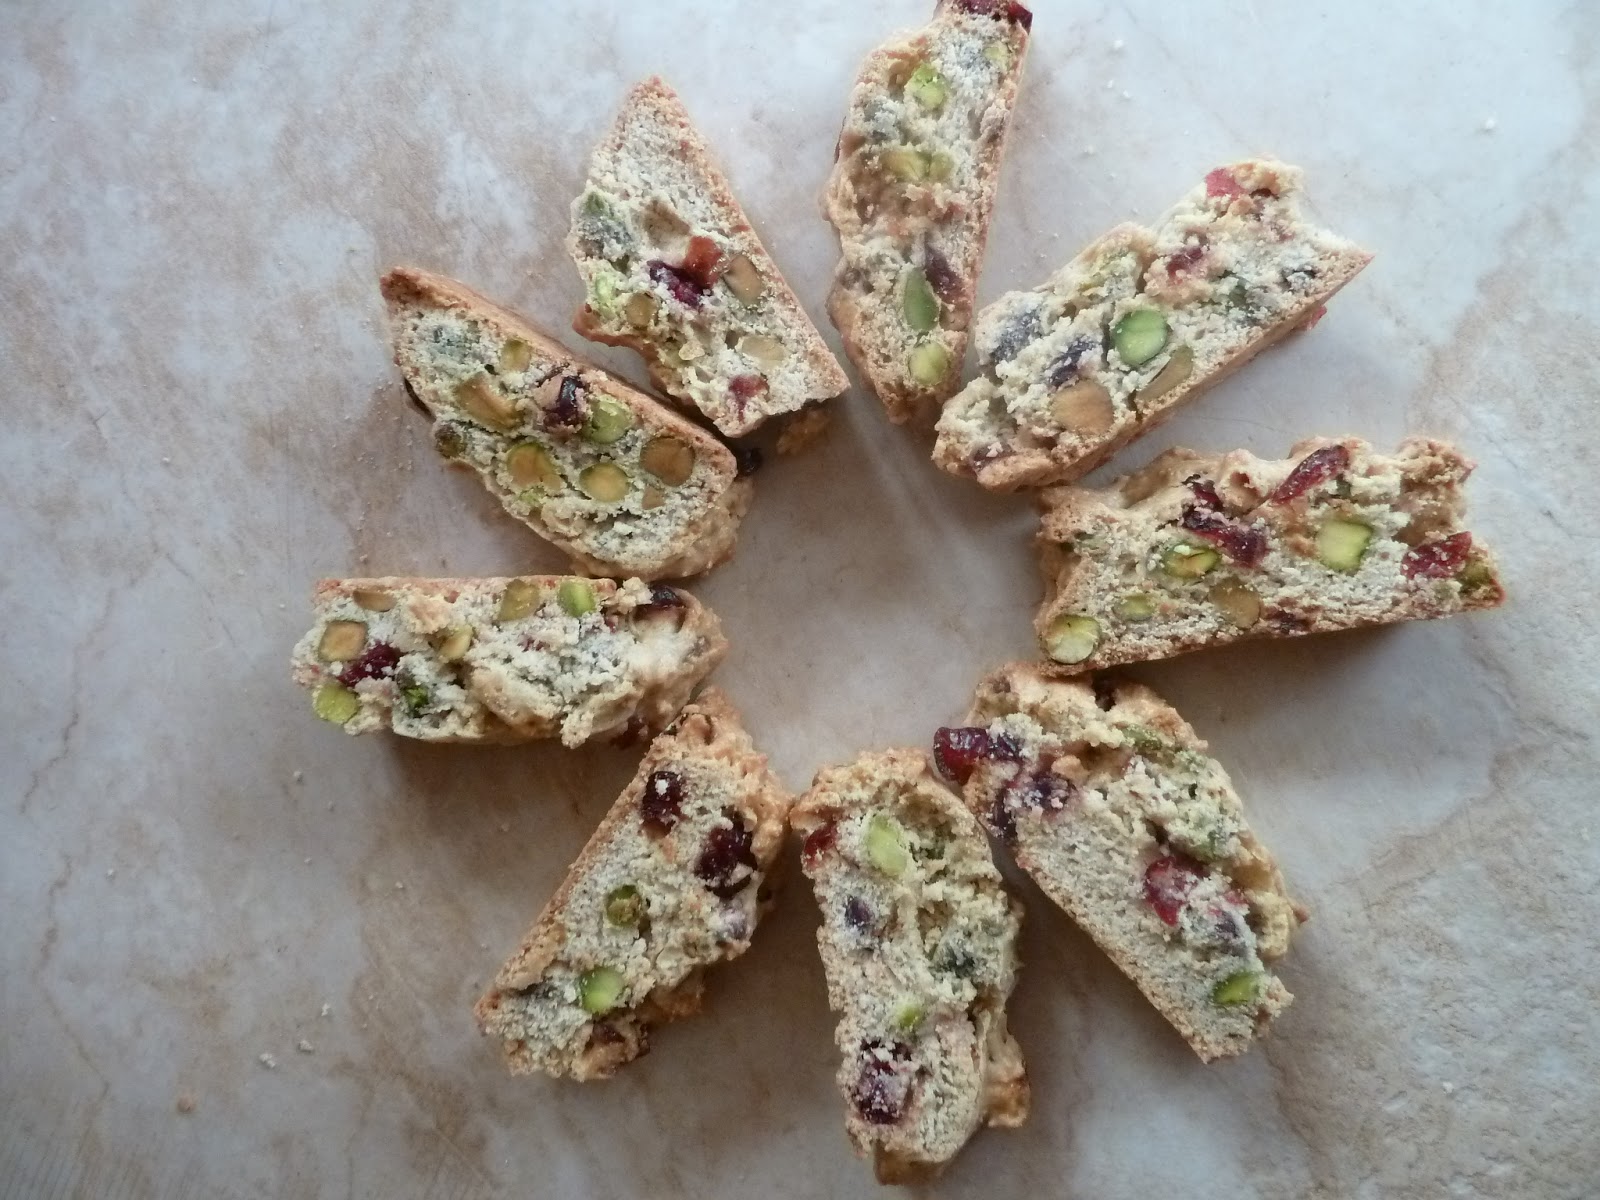
I loved the cookies. They're different from "normal" cookies, in texture and taste. I liked the ones with the cranberries and pistachios the best. I fell in love with that combination after I made these cranberry and pistachio biscotti, and it really worked out in this cookies. A friend of ours ordered cookies with pistachios from me for her birthday, and she chose these. She really loved them.


And yes, I've started/am trying to start a little "company", called 'Natuurlijk Katja' in dutch (which means something like 'Naturally Katja'). I've had a few orders, one for speculaas, one for 2 christmas cakes (at christmas offcourse), one for those biscotti, and some other cookies. My mother had organized a little winterfair about a month ago and I also had a marketstall there and sold cookie boxes. I sold them all! But that was it, really.

Now, I'll just leave you with the cookie recipe.


Condensed Milk Cookies (with Chocolate Chips, Sprinkles or Coconut)
(makes a LOT of cookies, based on several recipes available online: 1 2 3 4)
400g (3.5 sticks) butter, softened (I used some salted butter, you might want to add a pinch of salt if using unsalted butter)
1 can (395g) sweetened condensed milk
4 cups (about 500g) self-raising flour (you can make your own using plain flour + baking powder, just follow instructions on baking powder pack)
Toppings of your choice: I mixed 200g chocolate chips into half the dough, and coated 1/4 of the remaining cookies with coconut, and the other 1/4 with 100s & 1000s (rainbow sprinkles), you can also use nuts, sultanas, milo, cocoa powder, candied fruit, all kinds of stuff! If you want to make plain cookies you might want to add some extra sugar or vanilla because the dough needs a little extra something to go with it.
 
Preheat oven to 180°C (350°F) and line two cookie sheets with baking paper. Place butter in a large mixing bowl and beat with an electric mixer on high until smooth and fluffy. Add condensed milk and beat until smooth, scraping the sides of the bowl every now and then to ensure it mixes evenly. Stir in flour until just combined. The mixture should come together easily as a dough that is soft but still easy to handle with lightly-floured hands. (You may need to add extra flour, a tablespoon at a time if the mixture is too sticky). Take care not to overmix or you will make your biscuits tougher.
Add your desired toppings. As mentioned, I split my mixture in half and stirred chocolate chips into one half. Roll balls of cookie dough (I used a heaped tsp amount for small bite-sized cookies, and a heaped tbsp for larger cookies), press into discs and arrange on prepared trays. Leave at least a cm around each cookie. For the cookies I coated in toppings (sprinkles or coconut), I rolled them into balls with unfloured hands, then pressed them flat into a bowl of the toppings to coat the cookie.
Bake until cookies are light golden (about 12-15 mins for small cookies, 15-20 for larger cookies). If baking in hot weather, keep the uncooked cookies in the fridge until ready to go into the oven. Remove from oven and cool on tray for 5 mins, then transfer to a wire rack to cool completely. Store in an airtight container for several days.
This recipe makes a large amount of cookies, you can stir in the toppings and then roll the mixture into logs and wrap in clingfilm. These logs can be refrigerated for up to a week and sliced and baked at your convenience. Alternatively you can freeze the cookie dough logs to store it for longer, just defrost in the fridge for half an hour and do the same thing.


2/24/13

S'mores brownies

Freedom! Finally! No more school (for only one week, but still) and just doing nothing. 

It feels so good.


This past week has been full op big tests, so I was studying all the time. I can't see why we have to learn so much for all those tests, it's not like I still remember a thing a week later.
And really, do you need to know how to solve (x+4)(x+7)=x(8x-3)? How on earth could that be important?
Seriously, I don't see it.

But there's not much I can do about that, is there?


And now I don't have to care about that for a week. I can just sit down and do nothing.
Well, I won't do nothing. I will bake (yes!), go to Amsterdam or Utrecht to shop, hang out with some friends (if there are some left, almost everyone is going skiing), walk with my dog Mila (who is really cute!), watch all the Harry Potter movies again (I'm so not gonna tell you how many times I've already watched them) and I'll see what I'll do the rest of the time. Probably catching up with my sleep. I really don't hate to get up early, I quite like it, because then you can still do a lot, and if you sleep until 11 A.M. part of your day is already gone. Not that I don't love sleeping till 11 A.M. sometimes, but most days I prefer to get up earlier.


It's just that when you have to get up early because of something you don't like, such as school, it get's a lot more annoying. Because then you are sleeping good, and you get brutaly awakened by your alarm clock. And ofcourse, in the weekend, you wake up naturally at 7.30 A.M. That just sucks.


But everything is okay, because I made s'mores brownies. Only recently have I tasted a s'more for the first time. I know that's unbelievable, but here in the Netherlands we don't really have s'mores. We do roast marshmallows, we just don't put them between two cookies and chocolate and eat that heavenly little warm sandwich. We definitely should, because it's great.


And it's quite amazing transformed into brownies. You put the graham crackers (which we also don't really have here, so I used plain cookies of Verkade) in the brownies, top with marshmallows and bake.
 
You have to try these, they're really good.


S'mores Brownies
from Bakerella
Servings: 24 brownies
  • 1 cup unsalted butter
  • 10 oz. bittersweet chocolate, chopped
  • 1 cup sugar
  • 3/4 cup packed light brown sugar
  • 4 eggs
  • 2 tsp pure vanilla extract
  • 1 tsp kosher salt
  • 1 1/3 cups cake flour
  • 3 Tbsp natural cocoa powder
  • 6-8 whole graham crackers, crushed in your hand
  • 9 jumbo or 12 regular size marshmallows
 
Preheat oven to 350 degrees and generously grease a 9-by-13 inch baking dish
  1. In a large saucepan, melt butter and chocolate over low heat, stirring often until melted and smooth. Remove from heat and whisk in sugars. Then whisk in eggs one at a time, beating well after each addition. Whisk in the vanilla and salt.
  2. Sift the flour and cocoa over the chocolate mixture. Use a rubber spatular to stir just until blended. Stir in crushed graham crackers. Pour into dish, spreading evenly and top with marshmallows.
  3. Bake until a toothpick inserted comes out almost clean, 30-35 minutes. Cool and cut into gooey squares.
  4. NOTES: Try regular size marshmallows. The jumbo ones I used almost covered the entire surface of the brownie when baked and as they melted into the batter, caused me to increase the baking time significantly until done. About 30 minutes in, I covered the dish with foil to keep the marshmallowy tops from getting much darker. Smaller marshmallows would have yielded less goo and given the brownies more places to show through the surface. The few spots that weren't completely covered by marshmallow had a wonderful texture, but the marshmallow saturated sections were gooey even after increasing baking time to almost 45 minutes. But you may like that too. Either way - super yummy!

 Source: 2011 Home Baked Comfort by Kim Laidlaw by Weldon Owen Books

2/21/13

Vanilla Kipferl

Yeah, I know. I also thought that the first time I saw it. Kipferl?? What IS that?
Well, it's quite delicious.
But more about that later.


I'm gonna start with telling you something about this great baking book I have.
It's called Patisserie! and it's written by Christophe Felder. It includes 230 amazing recipes for creams, macarons, bonbons, tarts, doughs, decorations, brioches, viennoiseries, advent cookies and more! It has 3200 photos and detailed, step-by-step descriptions. I want to make almost all the recipes, they look so good!


I have the dutch book, and I don't know for sure whether it's also published in english, but it is worth looking that up! It really is a great book.
 
 
Now, back to the Vanilla Kipferl. It is from this book, as you might have guessed. The name Kipferl is quite an odd name, especially since 'kip' means 'chicken' in dutch. But these cookies doesn't include chicken at all! They only have a few ingredients and they really good! They're vanilla-y, soft, crumbly and melt-in-your-mouth cookies. They're really small, but that only means that you can eat a lot of 'em, which is a really good thing!


Vanilla Kipferl
from Patisserie! by Christophe Felder
makes around 40 cookies
Preparation time: 15 minutes
Baking time: 15 to 20 minutes
Ingredients
35 grams fine granulated sugar
1 vanilla bean
120 grams soft butter
140 grams flour
60 grams almond meal
1/2 teaspoon vanilla-essence

60 grams powdered sugar
2 bags (2 x 8 grams) vanilla sugar

Directions
Preheat the oven to 170 degrees Celsius.
Put the sugar in a food processor, add the vanilla bean and process until you have a nice vanilla sugar. Sieve the sugar in a bowl. Add the soft butter, flour, almond meal and vanilla-essence. Mix everything with a wooden spoon until you have a even dough. Knead the dough in to a ball with your hands. Divide the dough into 4 pieces.
Roll the pieces into log shapes on a floured workspace.
Lay them next to each other and cut them into 2 cm pieces.
Put the cookies on a floured (or with parchment paper) baking sheet. Bake them approximately 15 minutes in the oven. Meanwhile, mix the powdered sugar and the bags of vanilla sugar.
Let the done cookies cool down and then roll them in the vanilla powdered sugar.

Notes:
- If you don't have almond meal, you can also just process 60 grams of almonds (without the skin) until they are very fine. They will be a bit coarser then bought almond meal, but it works fine.
- 170 degrees Celsius is 340 degrees Fahrenheit

2/20/13

Cranberry Pistachio Biscotti

When I was in Italy during the summer break last year, there were delicious things everywhere. Biscotti, cantuccinni (or cantucci?), canolli... I ate as much of 'em as I could. They are so good. I almost always make 'soft' cookies, I don't make a lot of 'hard' cookies. I didn't ate any biscotti since we returned home.
And then I though; Why? Why don't I just make my own biscotti?
So I did.


I made cranberry pistachio biscotti. Because this was my first try with biscotti, I decided to make some with ingredients I don't use much, to stay in the 'new'-theme. Right....
I figure you're wondering how cranberries and pistachios can be not-very-much-used ingredients at my house. Well, I really don't have a good explanation, because I very much like pistachios and cranberries. I think I just always seem to forget them.


For a first try on biscotti, I liked them very much! The recipe was quite simple actually and the flavor are texture were great. I'm definitely making these again.


Note:
- I was out of olive oil (Yeah, I was also like; how can you be out of olive oil?!), so I used groundnut oil (arachideolie in dutch), and it worked out fine.
 
 
Cranberry Pistachio Biscotti
from Diamonds for Dessert

1/4 cup olive oil
3/4 cups sugar
2 tsp vanilla extract
1/2 tsp almond extract
2 eggs
1 3/4 cups flour
1/4 tsp salt
1 tsp baking powder
1/2 cup dried cranberries
1 1/2 cups pistachios

Preheat oven to 300°F. Mix sugar and olive oil together. Add in the eggs one at a time. Mix in the vanilla and almond extracts. In a separate bowl mix together the flour, salt, and baking powder. Add the dry ingredient mixture into the wet ingredients. Mix until no streaks of flour remain. Then mix in the cranberries and pistachios.

Line a cookie sheet with parchment paper. Divide the dough in two and form two 12x2 inch logs on the parchment lined cookie sheet. If the dough is sticky, wet your hands to make it easier to shape the dough. Bake the logs for 35 minutes. Remove them from the oven and let them cool for 10 minutes.

Change the oven temperature to 275°F. Slice each log into 18 slices. Place the slices back on the cookie sheet on their sides. Bake 8-10 minutes until dry. Let cool on the sheets for 10 minutes then move to a wire rack to finish cooling.

Makes 36 cookies.


2/19/13

My favorite Chocolate Chip Cookies

Everybody has a favorite chocolate chip cookie recipe, right?
Well, here comes mine.


Perfection, that's it.
I love a good chocolate chip cookie, and trust me, these are good!
The recipe's adapted from Jacques Torres' Chocolate Chip Cookie recipe. I changed the flours, because I couldn't find bread flour, and it worked out great!

I didn't just pick a recipe and said this is my favorite chocolate chip cookie recipe, no. About a year ago, I made 6 different chocolate chip cookies and we had a big tasting. My parent, my sisters and me. We tried them all, multiple times offcourse, and then we decided these were the best.

I love these the most right out of the oven, when their warm, gooey, soft and a bit dough-like still but with a little 'crust'. And when all af that gorgeous chocolate is still melted and warm.... I could eat these all day.

These cookies have a lot of chocolate in them. I always use milk chocolate, because I like that better :)


The dough is too good to not eat at least half of before they go into the oven. Mmmm.....


You have to make big cookies, because... Well, I don't really know because of what, but they're just nice big.

Or super big (see the ones in the pictures)


And when they come out of the oven, you have this:


Aren't they beautiful?

Perfect Chocolate Chip Cookie RecipeAdapted from Jacques Torres Secret Chocolate Chip Cookie Recipe
Makes twenty-six 5-inch cookies or 8 1/2 dozen 1 1/4-inch cookies
Ingredients
1 pound unsalted butter
1 3/4 cups granulated sugar
2 1/4 cups packed light-brown sugar
4 large eggs
3 cups plus 2 tablespoons cake flour
3 cups all purpose flour
1 tablespoon salt
2 teaspoons baking powder
2 teaspoons baking soda
1 tablespoon pure vanilla extract
2 pounds milk chocolate, coarsely chopped
Directions
- Preheat oven to 350 degrees. Line baking sheets with parchment paper or nonstick baking mats; set aside.
- In the bowl of an electric mixer fitted with the paddle attachment, cream together butter and sugars.
- Add eggs, one at a time, mixing well after each addition.
- Reduce speed to low and add both flours, baking powder, baking soda, vanilla, and chocolate; mix until well combined.
- Using a 4-ounce scoop for larger cookies or a 1-ounce scoop for smaller cookies, scoop cookie dough onto prepared baking sheets, about 2 inches apart.
- Bake until lightly browned, but still soft, about 20 minutes for larger cookies and about 15 minutes for smaller cookies.
- Cool slightly on baking sheets before transferring to a wire rack to cool completely. 

2/18/13

Snickerdoodles

I just realized that I have posted a recipe tasting like snickerdoodles, but not actual snickerdoodles yet.
O no! How could this happen? I have to end this!
So, here comes my snickerdoodle recipe. Well, it's not exactly mine, but I use it, so...
Well, let's just start with a picture of these beauties.


Now I feel so stupid for not saving them for now and just eating them right after they came out of the oven. But at least we've still got some pictures left.


The first time I made snickerdoodles, I loved them. And the next time, I decided to make different ones. I had seen a recipe for snicker-chip-doodles, with chocolate and toffee chips mixed in. I adored them, and from that moment on I only made those ones. But then, some time ago, I decided I should just make the normal snickerdoodles again, and they were o so good! A friend of mine doesn't like chocolate (OMG how could this be true?!) so for her I always make these ones, and she loves them. Everyone I know loves them, really. They're quite lovable.

 
Snickerdoodle Cookies
from How Sweet It Is
makes 16-20 cookies
1/2 cup butter, at room temperature
1 cup granulated sugar
1 egg
1 teaspoon vanilla extract
1 3/4 cups all-purpose flour
1/4 teaspoon salt
1/2 teaspoon baking powder
1 1/2 teaspoons cinnamon
2 tablespoons milk
1/4 cup sugar + 1 tablespoon cinnamon for dipping

Preheat oven to 375 degrees F.
Cream butter and sugar with an electric mixer until fluffy, about 5 minutes. Add egg and vanilla, mixing well until combine, about 2 minutes. Stir in flour, baking powder, salt, and 1 1/2 teaspoons cinnamon. Mix until dough comes together. Add in milk. If dough is still crumbly, add milk 1 tablespoon at a time until it comes together. Refrigerate for 30 minutes.
In a bowl combine remaining sugar and cinnamon. Remove dough from fridge and roll into big 1 1/2 inch balls. Dip in cinnamon sugar mixture and place on baking sheet. Bake for 8-10 minutes. 

2/17/13

French Silk Tart

Yesterday my uncle, aunt and niece came over for dinner. They brought soup and kroketten. So I decided to make dessert.


A had seen a quite easy recipe for French Silk Tart. It looked amazing (go and see here) and quite simple as I just said, so I decided to make that.
I made the crust, melted the chocolate in the hot cream, prepared the other cream and then I went and ruined it.
And it was so incredibly stupid.
I was whipping the chocolate cream in my stand mixer, and then... I over-whipped it.
I never do that! And now, when I was already on a tight schedule, I did. So I threw it away and went to the supermarket as fast as I could to buy new heavy cream, 'cause offcourse I didn't buy some extra just in case. Then I made a new chocolate cream, but it has to cool down for at least 45 minutes, so my tart wasn't done on time. My uncle and aunt had to leave, so they didn't had a chance to taste it.

But I did taste it, and it was very good! Very much whipping cream offcourse, but I love whipping cream so I didn't mind! My sister doesn't like whipping cream, so she didn't like this tart, but all the others did.

And they all lived happily ever after!


French Silk Tart
Prep Time: 20 minutes | Total Time: 2 hours, 00 minutes
 
For the Crust:
  • 15 oreo cookies, crushed
  • 5 tablespoons melted butter
For the Chocolate Whipped Cream:
  • 1-1/2 cups whipping cream
  • 1 cup chocolate chips
For the Whipped Cream Topping
  • 1 cup whipping cream
  • 1/2 teaspoon pure vanilla extract
  • 1 tablespoon sugar
  • Chocolate Shavings for garnish (optional)
Instructions
  • Combine the crushed oreos and melted butter in a small bowl; mix well and press onto the bottom of an 8-inch springform pan.
  • Refrigerate until needed to fill.
  • Pour the whipping cream into a medium sized mixing bowl and microwave for 1-1/2 to 2 minutes, or until hot.
  • Add in chocolate chips and whisk until melted.
  • Refrigerate for at least one hour; it needs to be cold and slightly thickened.
  • Prepare the Whipped Cream Topping by combining together the whipping cream, vanilla, and sugar.
  • Cover and chill in the refrigerator for 30 minutes.
  • When chilled, beat the mixture until stiff peaks form.
  • Take out the chilled chocolate mixture and beat on medium speed until stiff peaks form.
  • Spread the chocolate mixture over the oreo crust.
  • Spoon whipped cream topping over the chocolate layer and spread evenly.
  • Refrigerate for one hour or until set.
  • Garnish with chocolate shavings and serve.

2/14/13

Caramel Chocolate Chunk Cookies

Happy Valentine's Day!
I hope you all had a great day, full of love and your loved ones. And....

Cookies!! 
I mean, who doesn't love cookies? 


These cookies are so incredibly good!! You really must try them. They are chocolaty, and have just the slightest hint of caramel, which makes it different from a normal chocolate chip cookie.


Don't the look downright beautiful?


Yes, I want to get as much photos of these cookies in this post as possible! They're worth it, trust me.


Well, now I'll leave you with the recipe of these amazing cookies. Happy Valentine's Day!

Caramel Chocolate Chunk Cookies
1/2 cup (1 stick) butter
1 1/2 cups brown sugar
2 eggs
1 teaspoon vanilla
1/2 teaspoon kosher salt
2 cups flour
2 teaspoons baking powder
6-8 oz dark chocolate, chopped

In a small saucepan add the butter and brown sugar. Bring to a boil and simmer until the sugar has dissolved. Watch carefully as you don’t want to scorch the sugar.
Let this mixture cool slightly then add to a large mixing bowl and continue to cool for 20 minutes. Once cooled add the eggs and vanilla then stir to combine. Stir in the salt, flour and baking powder. With a few streaks of flour remaining add the chocolate. If the mixture is still warm some bits of the chocolate may melt. A little bit of melting is fine and sort of wonderful.
Place the bowl in the fridge and let chill for 30 minutes.
Pre-heat your oven to 350*
Line a sheet tray with parchment and set aside.
Scoop the batter into tablespoon-size rounds and place on the sheet tray. Bake for 12 minutes until golden around the rims. Let the cookies cool on the tray for five minutes while they settle into themselves creating a crackly crust.
Finish cooling on a wire rack.


2/13/13

Blackberry Apple Galettes

We had some blackberries left, a couple of apples and a box of blueberries. I recently came across this recipe for Blackberry Apple Galettes, and it was the first thing that popped into my mind when I wondered what to make with the fruit.


Well, my galettes didn't look exactly the same as the ones for Tartelette, but they still tasted very good. I think I had cooked my fruit too long, because it looked a bit like some sort of confiture, but I quite liked that.


This was my first try at a galette, but I'll definitely try it again soon! I like that they're so simple, you make the dough, put in the fridge, make filling, assemble the galettes and bake them!
 
Well, I'll just give you the recipe. Have fun making (and eating offcourse!) these galettes.


Blackberry Apple Galettes
Makes three 5-inch galettes

For the Pate Sucree:
2 cups (250gr) all purpose flour
2 tablespoons (25gr) sugar
pinch of salt
1 stick (113gr) butter, cut in small dices
1 egg
2-4 tablespoons cold water

In a large bowl, combine the flour, sugar and salt and cut in the butter with a pastry cutter or two forks until the mixture ressembles forms pea size crumbs. Make a well in the center and add the egg. With a fork, start working the flour in a little at a time and when most of it is incorporated, quickly mix the dough into a coherent and smooth mass, adding some cold water, a tablespoon at a time, if necessary (this varies depending on the humidity or altitude of where you live). Wrap the dough in plastic and let it rest in the refrigerator for 30 minutes.

For the fruit filling:
1 small apple (I chose Granny Smith, peeled, cored and diced
3 tablespoons lemon juice
2 tablespoons (25gr) sugar, divided
1 tablespoon (10gr)cornstarch
3 tablespoons water
1 cup (200gr) blackberries, or half blackberries and half blueberries
pinch of frech cracked black pepper
egg wash to brush the crust with before baking


In a medium saucepan set over medium low heat, cook the apple with one tablespoon of sugar and the lemon juice until fork tender. Add the blackberries and let them cook for a couple of minutes. Dilute the cornstarch in the water and add it to the fruits along with the cracked pepper. Cook until the mixture is not cloudy anymore from the cornstarch. Remove from the heat and let cool to room temperature.

To assemble:Preheat the oven to 350F.
Roll the dough onto a lightly floured surface to 1/4 inch thick and cut three 6-inch rounds in it and place them on a parchment paper lined baking sheet. Fill the center of each round with the filling and crimp the edges towards the center. I don't like to cover the fruit that much with the dough but that is a personal preference. Brush the crust with egg wash and sprinkle with the remaining sugar over the galettes. Bake for 15-20 minutes or until golden brown.


2/11/13

Chocolate Chip Vanilla Cupcakes with Chocolate Chip Cookie Crumb Frosting

I do not like school.


Let's just get that clear.

I kinda hate it.

Especially now, because I have to study all the time.
In a week time, we'll have a week full of tests, called CP-week, and those tests count for 3 'normal' tests, and we have to learn a lot for them.
So, I'm studying the whole time, unfortunately.

But today, I really didn't want to study, sooooo......

I made cupcakes.
Including chocolate.
And chocolate cookies.
Duh.


Because it had snowed this weekend, I went for cute snowmen cupcake liners, which I had bought some time ago but hadn't used yet. They were totally cute! Especially IN the snow.


A friend of us went to the USA last week, and bought me little cupcake liners for Valentine's Day! I think these liners are really cute! You can't see on these pictures, but on the bottom they have little hearts! So offcourse I couldn't wait for Valentine's Day itself (which is like 3 days away, but I hate waiting!) and baked these cupcakes with them.

 
And they're really tiny! (even though I definitely overfilled the liners, but whatever...)

 
O, and here are the cookies that went into the frosting. 


I always make big cookies, but this time I wanted to make REAL big ones, see the two big cookies in the picture.
These cookies were crumbled in the food processor and then mixed through the frosting.
In one word:
Delicious.

Chocolate Chip Cupcakes
makes 12 cupcakes
1/2 cup butter
1 cup sugar
2 eggs
1 teaspoon vanilla
1 1/2 cups flour
1 teaspoon baking powder
1/2 cup milk
1 cup chocolate chips
 
Preheat oven to 350.
Cream butter, sugar, and eggs together until fluffy. Add vanilla.
Combine dry ingredients in a bowl. Add half of the dry ingredients, mixing until just combined. Add the milk. Once mixed, add remaining dry ingredients. Add chocolate chips and mix if you’d like them in smaller pieces.
Pour into cupcake tins and bake for 20-25 mins at 350. Let cool, then frost.

Chocolate Chip Cookie Crumb Frosting Recipe
  • 2 cups cookie crumbs from your favorite baked chocolate chip cookies, pulsed in your food processor to a fine crumb-like consistency
  • 2 sticks unsalted butter, softened
  • 7 cups confectioners’ sugar
  • 1/3 cup milk
  • 2 teaspoons vanilla extract
Mix butter in mixing bowl until light and fluffy, approximately 2 minutes. Add 5 cups of the sugar, milk, and vanilla. On the medium speed of an electric mixer, beat until smooth and creamy, about 3 minutes. Gradually add the remaining 2 cups of sugar, 1 cup at a time, beating after each addition for approximately 2 minutes. Be sure that your frosting reaches a firm consistency that will pipe perfectly on top of cupcakes.
Pulse chocolate chip cookies for approximately 2 minutes until they reach a fine crumb-like consistency.
Using a spatula, gently fold cookie crumbs into frosting.
 
Note:
-I didn't put chocolate chips in all the cupcakes, but I liked the ones with chocolate better. What can I say, I just love chocolate :)
-I didn't really read that last sentence well, so I just put the crumbs in the bowl of my mixer and mixed it in. That's why my frosting is a lot browner than the frosting of Best Friends For Frosting. But it still tasted delicious.


2/10/13

Thin Apple Tart

I made a thin apple tart


It was delicious.

I had made a normal dutch apple pie a week ago (I will post that recipe soon too) and now I wanted to make another apple pie. There are just a few recipes I make regularly, snickerdoodles, chocolate chip cookies etc. But that's it. Most recipes I just make once or twice. I want to try as much things as possible, and not just be stuck to the same recipes. That's why I made this thin apple tart, 'cause I wanted to make something with apples and a crust, and this recipe matched my wishes.


There was just one thing.
The recipe didn't say you had to peel the apple, not for the apple compote nor for the apple slices on top. I decided to just follow the recipe, and I didn't peel them. I ended up wishing I had. Even though it still tasted very good, the skin of the apple was just very much there, if you understand me. You could really taste the skin, in the compote and on top. I think I would have loved this tart a lot more if I had peeled the apples. I recommend you to do it, it will just make your tart taste a lot better.
Well, I'll stop talking about apple skins, and give you the recipe.


Thin Apple Tart:
Serves 6 to 8
 
Ingredients:
For the crust:
2 tablespoons (20gr) slivered almonds
1/2 (60gr) cup powdered sugar, unsifted, divided
1/2 stick (57gr) unsalted butter, at room temperature
pinch of salt
3/4 cup (90gr) Jeanne's gluten free all-purpose flour mix
1 egg yolk

Directions:
Place almonds and 1 tablespoon powdered sugar in a food processor.
Pulse until the nuts are finely ground. In bowl of electric mixer fitted with paddle attachment, cream butter, ground nuts and salt on medium speed until well-combined.
Slowly add remaining powdered sugar and flour and mix well. Add the egg yolk and mix until incorporated. Shape dough into a ball and flatten into a disc. Wrap with plastic wrap and refrigerate for two hours or overnight. Place the dough in between two sheets of plastic wrap or parchment paper and roll it out to about 1/4-inch thick round. Place in a 9-inch tart pan, trim the edges. Prick the dough with a fork and refrigerate 30 minutes up to 2 hours. (you can even freeze the dough in the tart pan at this point and let thaw in the fridge overnight when you are ready). In the meantime, prepare the applesauce.

Apple Compote: (you can prepare it up to 2 days in advance)
1/2 vanilla bean
2 tablespoons sugar
6 medium apples (Golden Delicious apples)
1/4 cup to 1/3 cup (60 to 80ml) water

On a flat surface, cut the vanilla bean in half lengthwise without cutting all the way through and scrape the seeds from the pods with a pairing knife. Place them in a large saucepan along with the sugar. Set aside. Peel, core and roughly chop the apples. Add them to the vanilla and sugar mixture along with the water. Bring the mixture to a simmer over medium heat. Turn the heat down, cover and let the apples stew for about 1 hour. Check every 20 minutes to and add water to the mixture if the liquid evaporates faster than the apples can cook. Remove from the heat and let cool to room temperature. Scoop about 1 1/2 cups applesauce inside the prepared tart pan.

Apple Topping:
2 tablespoons (15gr) granulated sugar
zest of half a lemon
2-3 medium apples

Preheat oven to 350F and position a rack in the middle. In a small bowl, rub together the sugar and lemon zest so that the citrus natural oils can flavor the sugar. Peel, core and thinly slice the apples. Decoratively arrange the slices over the compote and sprinkle evenly with the sugar. Bake for 35-40 minutes or until the top apples are golden brown

2/8/13

Snickerdoodle Layer Cake

I just love snickerdoodles


I'm about to tell you a shocking thing;
I didn't even know about their existence until a year ago...
You're probably now staring at your computer screen with an open mouth and superlarge eyes filled with disbelief, shaking your head, whispering 'No, that can't be true...'
But it is true.
I live in the Netherlands, and here we don't have snickerdoodles. I found out about them on How Sweet It Is, and immediately knew I had to make them.
So I did.
It was one of the best things I had ever done.
And from that lovely moment on, I was enchanted with snickerdoodles.


So when I saw this recipe for a Snickerdoodle Sheet Cake, I knew I had to make that.

It was amazing, let me tell you that.
It was (offcourse) supersweet, but I love supersweet things :)

I didn't really change anything, I only added a little less powdered sugar, because I liked it better that way. And I didn't make a sheet cake, I made a layer cake. I just poured the batter into 2 cake pans, baked it and then sliced both of the cakes in 2, so that I had 4 layers. Then I put a lot of that supersweet, delicious frosting on it and done!

Well, I won't keep you any longer from making this delicious cake, so here is just one more picture of the cake (or maybe two, I just couldn't stop myself) and then the recipe.

I hope you'll have fun baking this delicious cake and love it as much as I do!


Snickerdoodle Sheet Cake
by Kristy Denney from Sweet Treats & More
Ingredients:
1 1/2 cups flour
1 1/2 cups cake flour
1 tbsp baking powder
1/2 tsp salt
1 tbsp cinnamon
2 sticks softened butter
1 3/4 cups sugar
4 eggs
2 tsp vanilla
1 1/4 cups milk
 
Heat oven to 325.
Butter and flour an 18 x 24 in sheet cake pan {or two round cake pans for layer cake}. Sift together both flours, baking powder, salt, and cinnamon and set aside.
Cream butter and sugar until pale and fluffy. Add eggs one at a time, then vanilla.
Alternating, add dry mixture, then milk in three batches.
Bake for 30-35 minutes. Let cool completely before frosting.
 
Brown Sugar Cinnamon Buttercream
Ingredients:
1 1/2 stick softened butter
1/3 cup brown sugar
1/2 tsp cinnamon
3 cups powdered sugar
3 tbsp half and half (milk will work too)
 
Mix butter, brown sugar, and cinnamon. Alternating, add powdered sugar and half and half. Frost cake.


P.s. Sorry for the not-so-good photography, I don't own a fancy camera. But this one works well enough!