3/2/13

Homemade Geneva Cookies


Here in the Netherlands, we don't really have Geneva cookies, or I'm just blind and never see 'em.
The point is, I have never eaten one. Like in my whole life. Or I forgot.
Let's just assume that I've never eaten one, okay?
Okay.


I really loved these cookies! I made 60 cookies, and now, 2 days later, I only have 12 cookies left.
Yeah, I'm not kidding. And my dog didn't ate them, for once! She is incredibly naughty and the minute she has the chance, she takes whatever she can take. Sometimes she even jumps up and grabs the sandwich in your hand. But that's part of why she fits so good in my family, we're all obsessed with food.
In my house are 6 people, including me, and we are real cookie lovers. Especially when the cookies are not that big, so naturally you can eat a dozen of them and not feel really guilty. Since they're small, it's okay, right?


'- To save time:
- You seriously don’t need to make these oval shaped – it saves a lot of hassle if you just make the cookies round: just roll the dough into 1″ balls, place on the lined cookie sheet and flatten into 1/4″ thick circles; they’ll be just as good, and much quicker to make.'

This is in the notes from Top with cinnamon. It's not that you can misunderstand it, it's quite clear. You really don't have to make these oval shaped. Really, you don't. And ofcourse, I was like; 'O, I'll just make them oval shaped, that looks nicer and then they're more like the original cookies and it's just cute. I mean, how much more work can it be?'
I was so wrong. They did look cute oval shaped, but it took a lot of time! I'd seriously recommend you to just make these round. Or, I just come to think of, you can roll the dough and then cut out ovals or rounds. Why didn't I try that? That would be a lot easier.


Izy from Top with cinnamon also has a super easy tutorial for tempering chocolate. I've once tried to temper chocolate, but it didn't really work out... Everything just got messy and coated with chocolate, except for the cookies I wanted to coat in chocolate. So I was really happy when I tried her method. You just keep on processing the chocolate in a food processor until it's nice and melted. It worked out really good! If you look well at the picture above, you'll see that the chocolate is shiny.


I made 4 different flavours. The 3 flavours that were in the recipe, and caramel.  I have a big box with little caramel bits that taste really nice and caramel-y. I liked the ones with candy cane and white chocolate the most. Chocolate drizzled with more chocolate is always a winner for me.


DIY Geneva Cookies – Pecan / Candy Cane / Coconut
Serving Size: makes about 50 cookies
 
14 tbsp (7 oz) unsalted butter (see notes)
3/4 cup granulated sugar
1 tbsp vanilla extract
1 tbsp vinegar (anything but balsamic!) or lemon juice
1/2 tsp salt
1 1/2 tsp baking powder
1/4 tsp baking soda
2 cups all purpose flour
8 to 10 oz semisweet / bittersweet chocolate, melted (and tempered if you can be bothered - see notes)
For the toppings ~ 1/2 to 2/3 cup of one of the following:
1/3 cup toasted chopped pecans, toasted dessicated coconut, crushed candy cane


Preheat your oven to 300 degrees F (150 degrees C).
Cream the butter, sugar, vanilla and vinegar/lemon juice together in a large bowl. Add in the next 4 ingredients and stir until just combined.
Divide the dough into 1" balls, roll the dough balls into 2 1/4" long sausage shapes, place onto a lined cookie sheet.

Flatten the sausages of dough into oval shapes (see notes) – about 1/4 inch thick, spaced 1/2″ apart on the cookie sheet.
Bake for 17-20 minutes until they are a light golden brown. Allow to cool on a wire rack.
Once cooled, spread about 1/2 tsp of melted (tempered if you can be bothered) chocolate onto the bottom of each cookie (you can use a pastry brush, pallette knife or butter knife), and sprinkle with your desired toppings. Let the chocolate set at room temperature. Store in an airtight container.


Notes from Top With Cinnamon:

-I’ve subbed half the butter for 3.5 0z of coconut oil (i.e. used 3.5 oz of butter + 3.5 oz of coconut oil) and it works just as well!
- If you want an easy way to temper the chocolate, I’ve got an easy, step-by-step image guide here
- To save time:
- You seriously don’t need to make these oval shaped – it saves a lot of hassle if you just make the cookies round: just roll the dough into 1″ balls, place on the lined cookie sheet and flatten into 1/4″ thick circles; they’ll be just as good, and much quicker to make.
- instead of coating the bottom of the cookies w/ the chocolate, just dip one half of the cookie into the chocolate, then dip it into the toppings
- You can use any other toppings you want – don’t limit yourself to those three, go crazy! – chopped peanuts, hazelnuts, spread on some nutella, crushed pretzels, crushed potato chips, flaky sea salt, chopped toffee, chopped candy bars (rolo or snickers would be just…I can’t even…), dried fruit, freeze dried fruit, mini marshmallows… whatever!
- I also drizzled the peppermint Geneva Cookies with a but of melted white chocolate for some pizazz :O ahaha


2/26/13

Some links

Single Lady Cookie-28
from Top with cinnamon


1. I just discovered this blog, and it's amazing! She is really talented. She makes great photo's, great recipes and she writes great.

2. I really love these shoes!

3. I don't really wear dresses, but if I would I'd buy all my dresses here!

4. I'm obsessed with s'mores, and this would be a really good idea for a dessert buffet!

5. I still have some candy canes left over from christmas, and I'm gonna turn them into these mousses, I think they'd be delicious!

6. This blog really is too beautiful! The photos, recipes, little videos! It's really beautiful.

7. How to make your own cotton candy. I never really thought of making that, but I really want to make it now!

8. These caramel brownie tarts seem really easy to make! If I don't have a lot of time but do have to make something, I'll try these!


Sweetened Condensed Milk Cookies

I had half a can of sweetenend condensed milk left, the other half I used for Martha Washington Candy that I made on George Washingtons Birthday, which was last friday. I don't like to waste things, so I looked up recipes which use sweetened condensed milk, and I ended up making this recipe for sweetened condensed milk cookies. There are only 3 main ingredients, and then you can add in anything you want, such as chocolate, cranberries, cocoa, nuts, and more.


 made half of the original recipe, since I only had half a can left, and divided that in 3. I added chocolate chips to one part, cranberries and pistachios to another and I tried to make s'mores cookies by adding marshmallows and graham crackers to the third part.


I loved the cookies. They're different from "normal" cookies, in texture and taste. I liked the ones with the cranberries and pistachios the best. I fell in love with that combination after I made these cranberry and pistachio biscotti, and it really worked out in this cookies. A friend of ours ordered cookies with pistachios from me for her birthday, and she chose these. She really loved them.


And yes, I've started/am trying to start a little "company", called 'Natuurlijk Katja' in dutch (which means something like 'Naturally Katja'). I've had a few orders, one for speculaas, one for 2 christmas cakes (at christmas offcourse), one for those biscotti, and some other cookies. My mother had organized a little winterfair about a month ago and I also had a marketstall there and sold cookie boxes. I sold them all! But that was it, really.

Now, I'll just leave you with the cookie recipe.


Condensed Milk Cookies (with Chocolate Chips, Sprinkles or Coconut)
(makes a LOT of cookies, based on several recipes available online: 1 2 3 4)
400g (3.5 sticks) butter, softened (I used some salted butter, you might want to add a pinch of salt if using unsalted butter)
1 can (395g) sweetened condensed milk
4 cups (about 500g) self-raising flour (you can make your own using plain flour + baking powder, just follow instructions on baking powder pack)
Toppings of your choice: I mixed 200g chocolate chips into half the dough, and coated 1/4 of the remaining cookies with coconut, and the other 1/4 with 100s & 1000s (rainbow sprinkles), you can also use nuts, sultanas, milo, cocoa powder, candied fruit, all kinds of stuff! If you want to make plain cookies you might want to add some extra sugar or vanilla because the dough needs a little extra something to go with it.
 
Preheat oven to 180°C (350°F) and line two cookie sheets with baking paper. Place butter in a large mixing bowl and beat with an electric mixer on high until smooth and fluffy. Add condensed milk and beat until smooth, scraping the sides of the bowl every now and then to ensure it mixes evenly. Stir in flour until just combined. The mixture should come together easily as a dough that is soft but still easy to handle with lightly-floured hands. (You may need to add extra flour, a tablespoon at a time if the mixture is too sticky). Take care not to overmix or you will make your biscuits tougher.
Add your desired toppings. As mentioned, I split my mixture in half and stirred chocolate chips into one half. Roll balls of cookie dough (I used a heaped tsp amount for small bite-sized cookies, and a heaped tbsp for larger cookies), press into discs and arrange on prepared trays. Leave at least a cm around each cookie. For the cookies I coated in toppings (sprinkles or coconut), I rolled them into balls with unfloured hands, then pressed them flat into a bowl of the toppings to coat the cookie.
Bake until cookies are light golden (about 12-15 mins for small cookies, 15-20 for larger cookies). If baking in hot weather, keep the uncooked cookies in the fridge until ready to go into the oven. Remove from oven and cool on tray for 5 mins, then transfer to a wire rack to cool completely. Store in an airtight container for several days.
This recipe makes a large amount of cookies, you can stir in the toppings and then roll the mixture into logs and wrap in clingfilm. These logs can be refrigerated for up to a week and sliced and baked at your convenience. Alternatively you can freeze the cookie dough logs to store it for longer, just defrost in the fridge for half an hour and do the same thing.


2/24/13

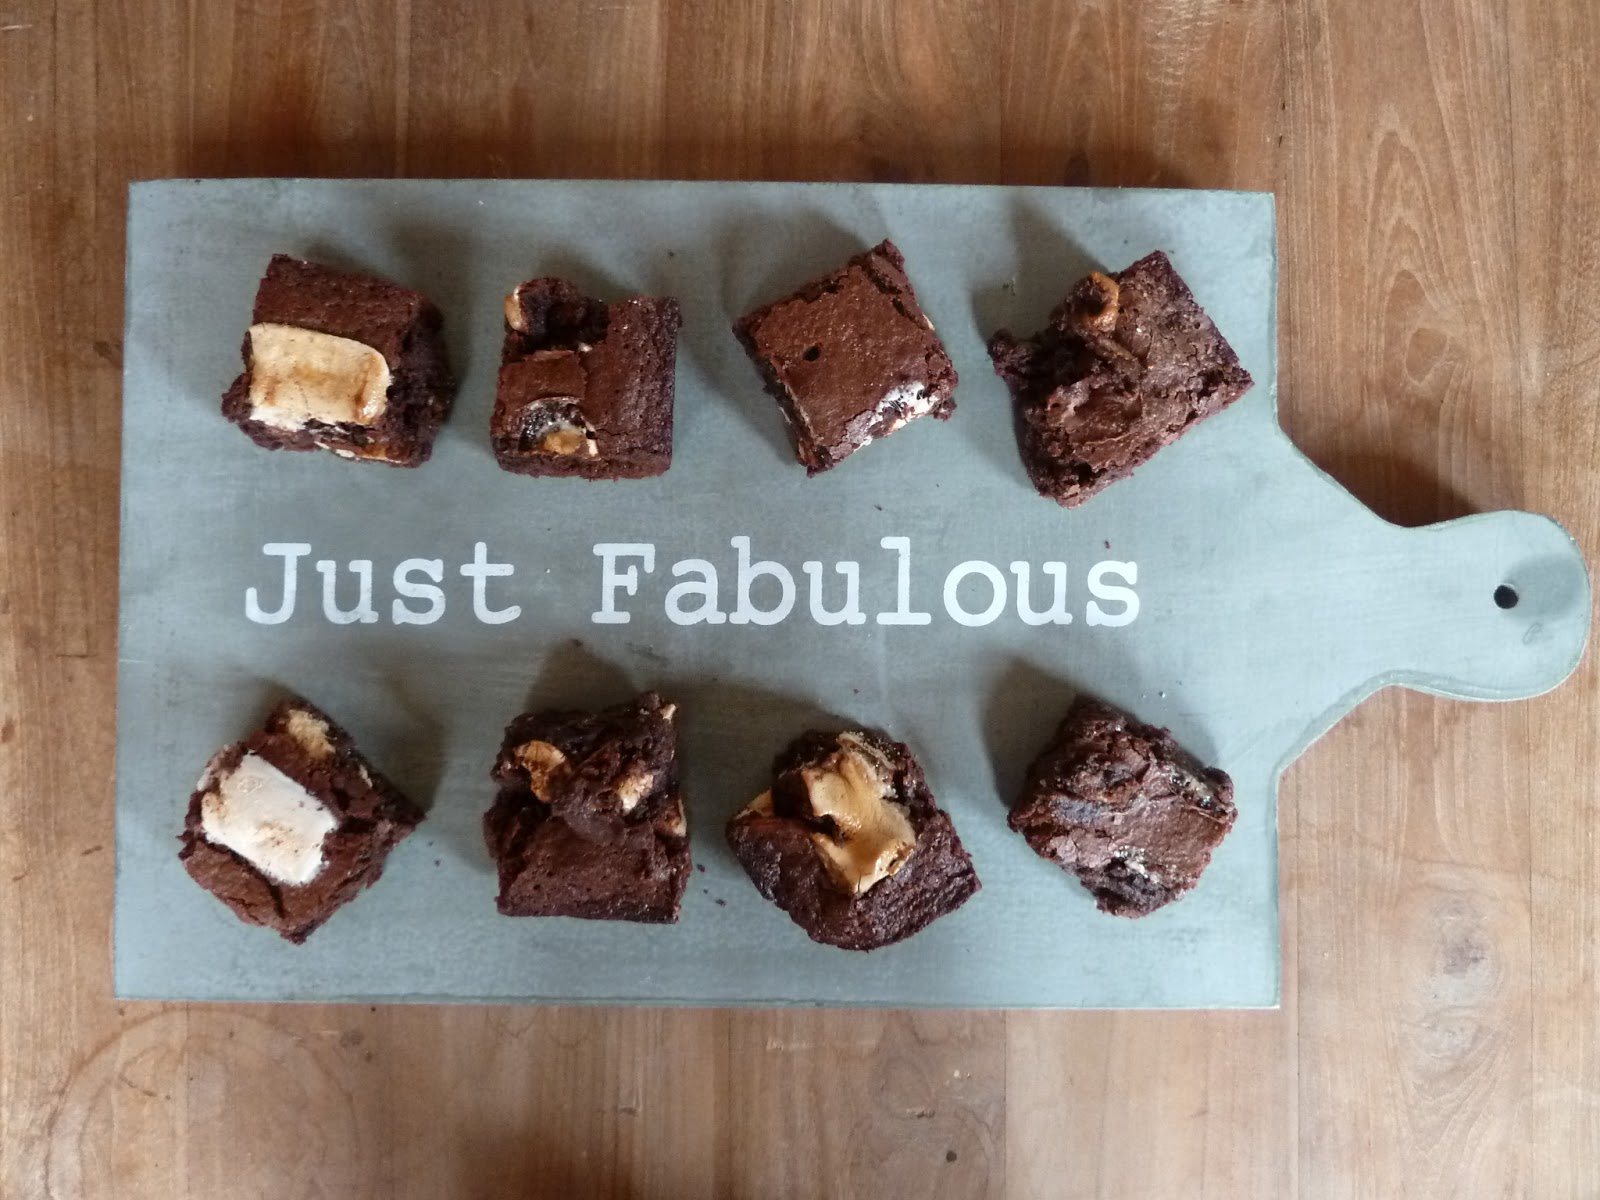
S'mores brownies

Freedom! Finally! No more school (for only one week, but still) and just doing nothing. 

It feels so good.


This past week has been full op big tests, so I was studying all the time. I can't see why we have to learn so much for all those tests, it's not like I still remember a thing a week later.
And really, do you need to know how to solve (x+4)(x+7)=x(8x-3)? How on earth could that be important?
Seriously, I don't see it.

But there's not much I can do about that, is there?


And now I don't have to care about that for a week. I can just sit down and do nothing.
Well, I won't do nothing. I will bake (yes!), go to Amsterdam or Utrecht to shop, hang out with some friends (if there are some left, almost everyone is going skiing), walk with my dog Mila (who is really cute!), watch all the Harry Potter movies again (I'm so not gonna tell you how many times I've already watched them) and I'll see what I'll do the rest of the time. Probably catching up with my sleep. I really don't hate to get up early, I quite like it, because then you can still do a lot, and if you sleep until 11 A.M. part of your day is already gone. Not that I don't love sleeping till 11 A.M. sometimes, but most days I prefer to get up earlier.


It's just that when you have to get up early because of something you don't like, such as school, it get's a lot more annoying. Because then you are sleeping good, and you get brutaly awakened by your alarm clock. And ofcourse, in the weekend, you wake up naturally at 7.30 A.M. That just sucks.


But everything is okay, because I made s'mores brownies. Only recently have I tasted a s'more for the first time. I know that's unbelievable, but here in the Netherlands we don't really have s'mores. We do roast marshmallows, we just don't put them between two cookies and chocolate and eat that heavenly little warm sandwich. We definitely should, because it's great.


And it's quite amazing transformed into brownies. You put the graham crackers (which we also don't really have here, so I used plain cookies of Verkade) in the brownies, top with marshmallows and bake.
 
You have to try these, they're really good.


S'mores Brownies
from Bakerella
Servings: 24 brownies
  • 1 cup unsalted butter
  • 10 oz. bittersweet chocolate, chopped
  • 1 cup sugar
  • 3/4 cup packed light brown sugar
  • 4 eggs
  • 2 tsp pure vanilla extract
  • 1 tsp kosher salt
  • 1 1/3 cups cake flour
  • 3 Tbsp natural cocoa powder
  • 6-8 whole graham crackers, crushed in your hand
  • 9 jumbo or 12 regular size marshmallows
 
Preheat oven to 350 degrees and generously grease a 9-by-13 inch baking dish
  1. In a large saucepan, melt butter and chocolate over low heat, stirring often until melted and smooth. Remove from heat and whisk in sugars. Then whisk in eggs one at a time, beating well after each addition. Whisk in the vanilla and salt.
  2. Sift the flour and cocoa over the chocolate mixture. Use a rubber spatular to stir just until blended. Stir in crushed graham crackers. Pour into dish, spreading evenly and top with marshmallows.
  3. Bake until a toothpick inserted comes out almost clean, 30-35 minutes. Cool and cut into gooey squares.
  4. NOTES: Try regular size marshmallows. The jumbo ones I used almost covered the entire surface of the brownie when baked and as they melted into the batter, caused me to increase the baking time significantly until done. About 30 minutes in, I covered the dish with foil to keep the marshmallowy tops from getting much darker. Smaller marshmallows would have yielded less goo and given the brownies more places to show through the surface. The few spots that weren't completely covered by marshmallow had a wonderful texture, but the marshmallow saturated sections were gooey even after increasing baking time to almost 45 minutes. But you may like that too. Either way - super yummy!

 Source: 2011 Home Baked Comfort by Kim Laidlaw by Weldon Owen Books

2/21/13

Vanilla Kipferl

Yeah, I know. I also thought that the first time I saw it. Kipferl?? What IS that?
Well, it's quite delicious.
But more about that later.


I'm gonna start with telling you something about this great baking book I have.
It's called Patisserie! and it's written by Christophe Felder. It includes 230 amazing recipes for creams, macarons, bonbons, tarts, doughs, decorations, brioches, viennoiseries, advent cookies and more! It has 3200 photos and detailed, step-by-step descriptions. I want to make almost all the recipes, they look so good!


I have the dutch book, and I don't know for sure whether it's also published in english, but it is worth looking that up! It really is a great book.
 
 
Now, back to the Vanilla Kipferl. It is from this book, as you might have guessed. The name Kipferl is quite an odd name, especially since 'kip' means 'chicken' in dutch. But these cookies doesn't include chicken at all! They only have a few ingredients and they really good! They're vanilla-y, soft, crumbly and melt-in-your-mouth cookies. They're really small, but that only means that you can eat a lot of 'em, which is a really good thing!


Vanilla Kipferl
from Patisserie! by Christophe Felder
makes around 40 cookies
Preparation time: 15 minutes
Baking time: 15 to 20 minutes
Ingredients
35 grams fine granulated sugar
1 vanilla bean
120 grams soft butter
140 grams flour
60 grams almond meal
1/2 teaspoon vanilla-essence

60 grams powdered sugar
2 bags (2 x 8 grams) vanilla sugar

Directions
Preheat the oven to 170 degrees Celsius.
Put the sugar in a food processor, add the vanilla bean and process until you have a nice vanilla sugar. Sieve the sugar in a bowl. Add the soft butter, flour, almond meal and vanilla-essence. Mix everything with a wooden spoon until you have a even dough. Knead the dough in to a ball with your hands. Divide the dough into 4 pieces.
Roll the pieces into log shapes on a floured workspace.
Lay them next to each other and cut them into 2 cm pieces.
Put the cookies on a floured (or with parchment paper) baking sheet. Bake them approximately 15 minutes in the oven. Meanwhile, mix the powdered sugar and the bags of vanilla sugar.
Let the done cookies cool down and then roll them in the vanilla powdered sugar.

Notes:
- If you don't have almond meal, you can also just process 60 grams of almonds (without the skin) until they are very fine. They will be a bit coarser then bought almond meal, but it works fine.
- 170 degrees Celsius is 340 degrees Fahrenheit

2/20/13

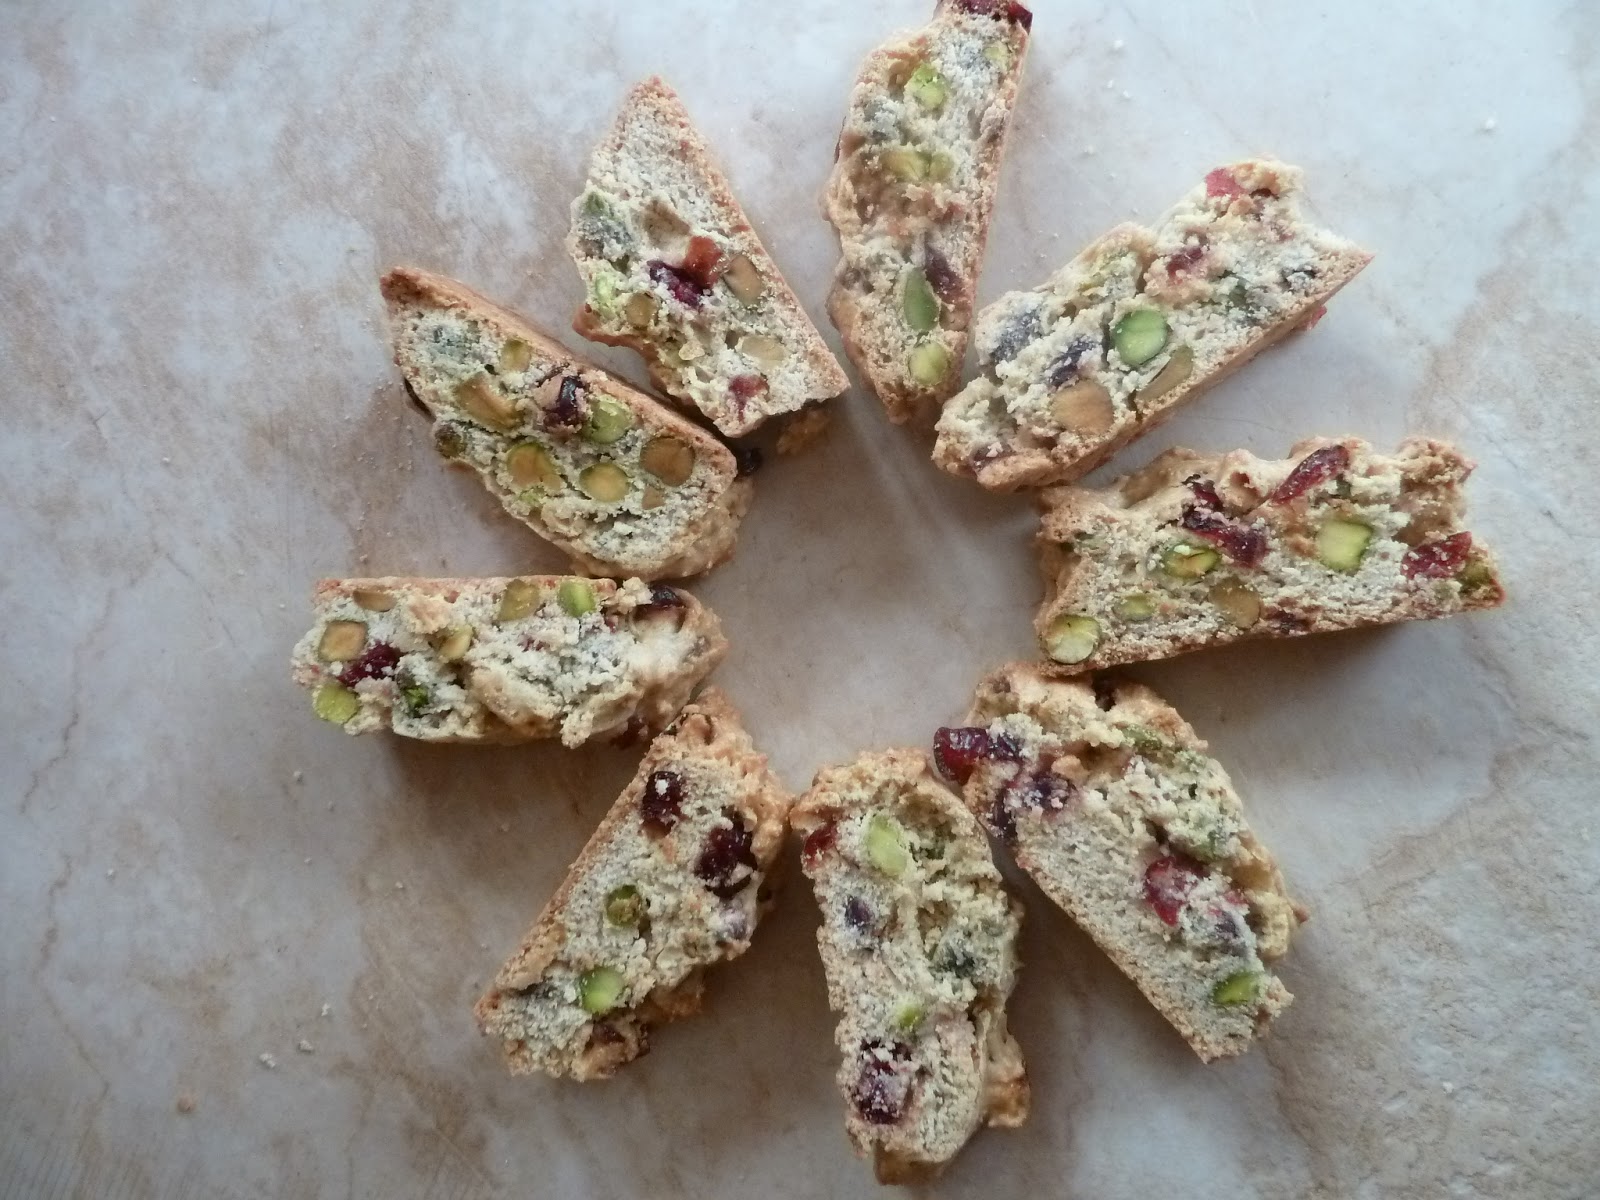
Cranberry Pistachio Biscotti

When I was in Italy during the summer break last year, there were delicious things everywhere. Biscotti, cantuccinni (or cantucci?), canolli... I ate as much of 'em as I could. They are so good. I almost always make 'soft' cookies, I don't make a lot of 'hard' cookies. I didn't ate any biscotti since we returned home.
And then I though; Why? Why don't I just make my own biscotti?
So I did.


I made cranberry pistachio biscotti. Because this was my first try with biscotti, I decided to make some with ingredients I don't use much, to stay in the 'new'-theme. Right....
I figure you're wondering how cranberries and pistachios can be not-very-much-used ingredients at my house. Well, I really don't have a good explanation, because I very much like pistachios and cranberries. I think I just always seem to forget them.


For a first try on biscotti, I liked them very much! The recipe was quite simple actually and the flavor are texture were great. I'm definitely making these again.


Note:
- I was out of olive oil (Yeah, I was also like; how can you be out of olive oil?!), so I used groundnut oil (arachideolie in dutch), and it worked out fine.
 
 
Cranberry Pistachio Biscotti
from Diamonds for Dessert

1/4 cup olive oil
3/4 cups sugar
2 tsp vanilla extract
1/2 tsp almond extract
2 eggs
1 3/4 cups flour
1/4 tsp salt
1 tsp baking powder
1/2 cup dried cranberries
1 1/2 cups pistachios

Preheat oven to 300°F. Mix sugar and olive oil together. Add in the eggs one at a time. Mix in the vanilla and almond extracts. In a separate bowl mix together the flour, salt, and baking powder. Add the dry ingredient mixture into the wet ingredients. Mix until no streaks of flour remain. Then mix in the cranberries and pistachios.

Line a cookie sheet with parchment paper. Divide the dough in two and form two 12x2 inch logs on the parchment lined cookie sheet. If the dough is sticky, wet your hands to make it easier to shape the dough. Bake the logs for 35 minutes. Remove them from the oven and let them cool for 10 minutes.

Change the oven temperature to 275°F. Slice each log into 18 slices. Place the slices back on the cookie sheet on their sides. Bake 8-10 minutes until dry. Let cool on the sheets for 10 minutes then move to a wire rack to finish cooling.

Makes 36 cookies.


2/19/13

My favorite Chocolate Chip Cookies

Everybody has a favorite chocolate chip cookie recipe, right?
Well, here comes mine.


Perfection, that's it.
I love a good chocolate chip cookie, and trust me, these are good!
The recipe's adapted from Jacques Torres' Chocolate Chip Cookie recipe. I changed the flours, because I couldn't find bread flour, and it worked out great!

I didn't just pick a recipe and said this is my favorite chocolate chip cookie recipe, no. About a year ago, I made 6 different chocolate chip cookies and we had a big tasting. My parent, my sisters and me. We tried them all, multiple times offcourse, and then we decided these were the best.

I love these the most right out of the oven, when their warm, gooey, soft and a bit dough-like still but with a little 'crust'. And when all af that gorgeous chocolate is still melted and warm.... I could eat these all day.

These cookies have a lot of chocolate in them. I always use milk chocolate, because I like that better :)


The dough is too good to not eat at least half of before they go into the oven. Mmmm.....


You have to make big cookies, because... Well, I don't really know because of what, but they're just nice big.

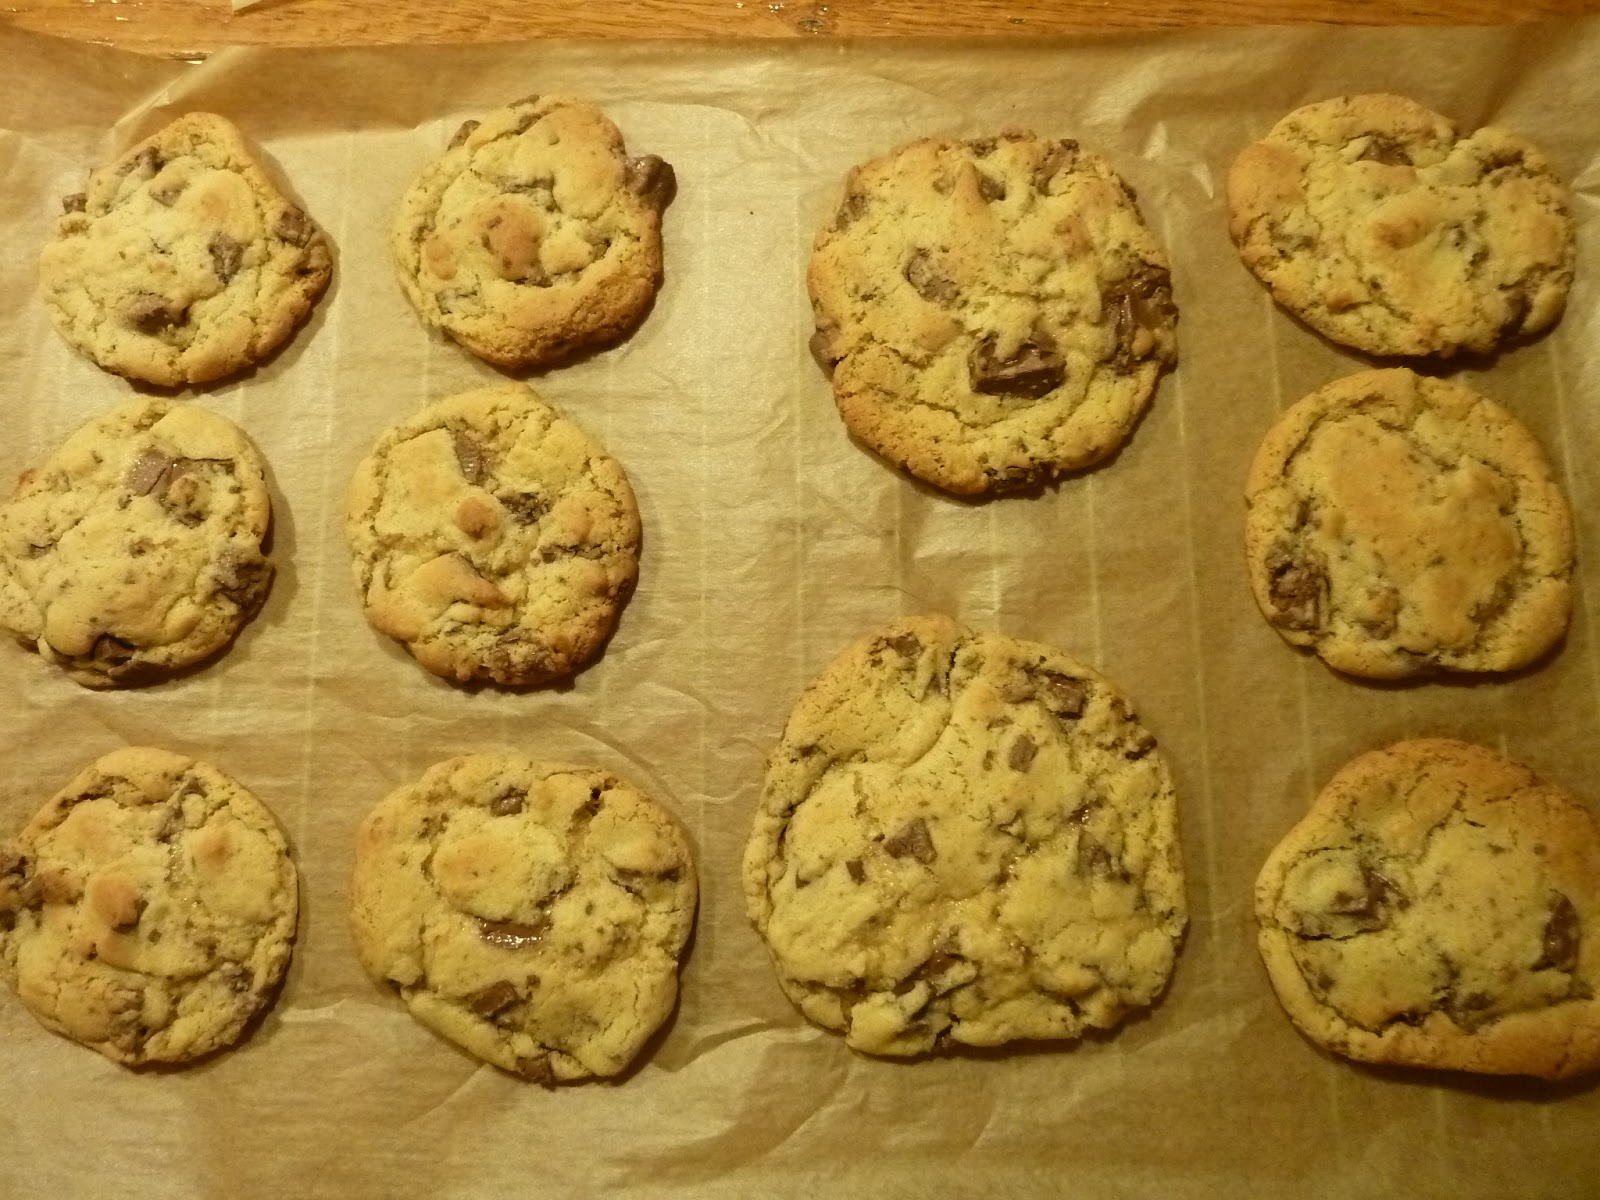
Or super big (see the ones in the pictures)


And when they come out of the oven, you have this:


Aren't they beautiful?

Perfect Chocolate Chip Cookie RecipeAdapted from Jacques Torres Secret Chocolate Chip Cookie Recipe
Makes twenty-six 5-inch cookies or 8 1/2 dozen 1 1/4-inch cookies
Ingredients
1 pound unsalted butter
1 3/4 cups granulated sugar
2 1/4 cups packed light-brown sugar
4 large eggs
3 cups plus 2 tablespoons cake flour
3 cups all purpose flour
1 tablespoon salt
2 teaspoons baking powder
2 teaspoons baking soda
1 tablespoon pure vanilla extract
2 pounds milk chocolate, coarsely chopped
Directions
- Preheat oven to 350 degrees. Line baking sheets with parchment paper or nonstick baking mats; set aside.
- In the bowl of an electric mixer fitted with the paddle attachment, cream together butter and sugars.
- Add eggs, one at a time, mixing well after each addition.
- Reduce speed to low and add both flours, baking powder, baking soda, vanilla, and chocolate; mix until well combined.
- Using a 4-ounce scoop for larger cookies or a 1-ounce scoop for smaller cookies, scoop cookie dough onto prepared baking sheets, about 2 inches apart.
- Bake until lightly browned, but still soft, about 20 minutes for larger cookies and about 15 minutes for smaller cookies.
- Cool slightly on baking sheets before transferring to a wire rack to cool completely.